Subtotal $0.00
Engineered hardwood flooring has become one of the most popular flooring choices in Canadian homes, combining the timeless elegance of natural wood with the practical advantages of modern construction. Unlike solid hardwood, engineered hardwood is constructed with multiple layers, providing enhanced stability and resistance to moisture—making it particularly suitable for Canada’s varied climate. In this guide, we will explore everything you need to know about engineered hardwood installation in Canada, from preparation to maintenance.
What Is Engineered Hardwood Flooring?
Engineered hardwood consists of a real hardwood veneer layer bonded over multiple layers of plywood or high-density fiberboard (HDF). This layered construction gives it superior stability compared to solid hardwood, which can expand and contract significantly with changes in temperature and humidity. The top layer showcases the natural beauty of wood, while the underlying layers provide strength, making it a long-lasting flooring solution.
Why Choose Engineered Hardwood in Canada?
Canada experiences a wide range of climates, from humid summers to freezing winters. Engineered hardwood is more resistant to warping, cupping, or gapping than solid wood, making it ideal for homes in areas with high humidity or underfloor heating. Other advantages include:
- Aesthetic Appeal: Available in various wood species, finishes, and plank sizes, engineered hardwood can complement any interior design.
- Durability: The top hardwood layer can be sanded and refinished multiple times, depending on thickness.
- Ease of Installation: Suitable for a variety of installation methods, including floating, glue-down, or nail-down, depending on your subfloor.
- Environmental Consideration: Engineered hardwood uses less solid wood than traditional flooring, making it a more sustainable choice.
Preparing for Installation
Proper preparation is key to ensuring a successful installation. Before laying your engineered hardwood, consider the following:
- Acclimatization: Engineered hardwood should be stored in the room where it will be installed for at least 48–72 hours. This allows the wood to adjust to the room’s temperature and humidity.
- Subfloor Inspection: Ensure the subfloor is clean, dry, level, and free of debris. Concrete subfloors may require a moisture barrier, while plywood subfloors must be secure and flat.
- Tools and Materials: Common tools include a saw, tape measure, spacers, hammer, tapping block, pull bar, and underlayment if necessary.
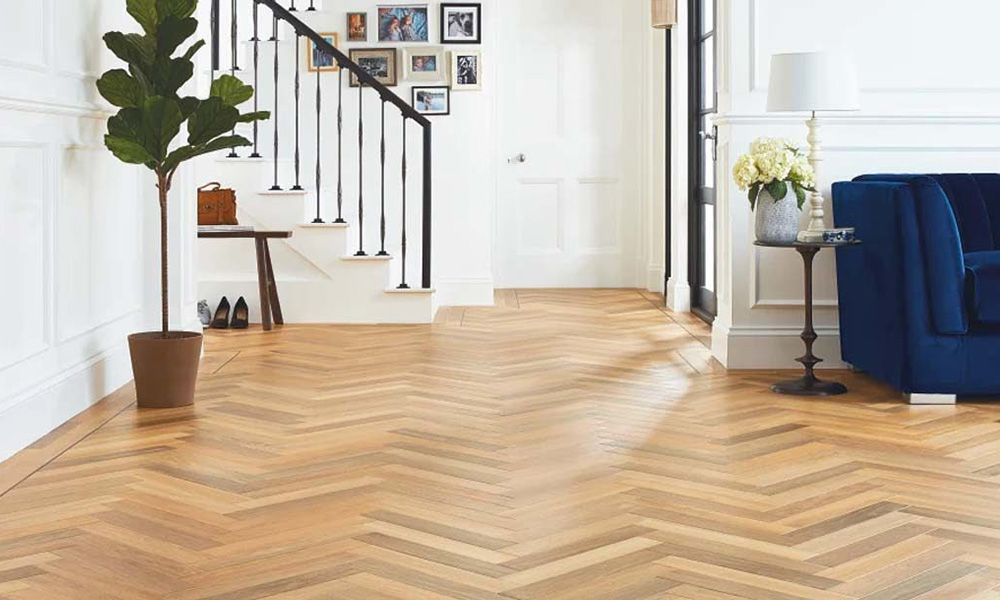
- Room Preparation: Remove furniture, moldings, and baseboards. Identify the layout pattern—whether straight, diagonal, or herringbone—for optimal visual effect.
Installation Methods
Engineered hardwood can be installed in several ways depending on the subfloor and personal preference:
1. Floating Installation
In this method, the planks are not glued or nailed to the subfloor but instead click together and “float” over an underlayment. This is ideal for radiant heated floors or existing flooring surfaces. Benefits include easy removal and minimal subfloor preparation.
2. Glue-Down Installation
Glue-down installation involves adhering the planks directly to the subfloor using a high-quality wood adhesive. This method offers superior stability and is commonly used over concrete subfloors in basements.
3. Nail-Down or Staple-Down Installation
This traditional method secures planks directly to a wooden subfloor with nails or staples. It provides excellent durability and is suitable for solid subfloors, particularly in living rooms or bedrooms.
Step-by-Step Installation Guide
- Install Underlayment: If your chosen method requires it, lay an underlayment to provide sound insulation and moisture protection.
- Plan the Layout: Measure the room carefully, starting from the longest wall. Stagger the joints to create a natural look.
- Start Laying Planks: Depending on the method, begin at the wall with the tongue side facing the wall. Use spacers to maintain a ¼-inch expansion gap around the perimeter.
- Cutting and Fitting: Measure and cut planks as necessary using a saw. Ensure tight joints and a seamless appearance.
- Finishing Touches: Remove spacers and install baseboards or moldings to cover expansion gaps. Clean the floor thoroughly to remove dust and adhesive residue.
Maintenance Tips
Proper maintenance ensures your engineered hardwood lasts for decades:
- Regular Cleaning: Sweep or vacuum regularly to remove dirt and grit. Use a damp mop with a pH-neutral cleaner suitable for hardwood.
- Avoid Excess Moisture: Engineered hardwood is more moisture-resistant than solid wood but still avoid standing water.
- Protect from Scratches: Use felt pads under furniture and avoid walking with high heels on the floor.
- Refinishing: Depending on the thickness of the wear layer, engineered hardwood can be lightly sanded and refinished to restore its original beauty.
Choosing Professional Installation in Canada
While DIY installation is possible, many homeowners in Canada prefer hiring professional installers. Certified installers ensure proper subfloor preparation, correct installation method, and precise alignment. This reduces the risk of damage, gaps, or uneven surfaces and often comes with installation warranties for added peace of mind.
Conclusion
Engineered hardwood flooring offers the perfect combination of beauty, durability, and practicality for Canadian homes. Whether you live in a humid coastal city or a cold prairie province, engineered hardwood adapts to your environment while maintaining its luxurious appearance. Proper preparation, careful installation, and regular maintenance are essential to maximize the lifespan of your flooring.
Investing in engineered hardwood is investing in your home’s long-term value and elegance. Whether you choose a DIY approach or professional installation, this flooring option ensures your Canadian home will have a warm, inviting, and stylish foundation for years to come.

